Best Valorant Sage Walls for Abyss
Positions you need to know from the walls to dominate the map
 Image Credits: Riot Games
Sage can really dominate on Abyss, but only if you know the right line-ups. Here are the best wall-placements on Abyss, both for post- and pre-plant situations, as well as mid, and some off-angle peeks.
A-MAIN Peek
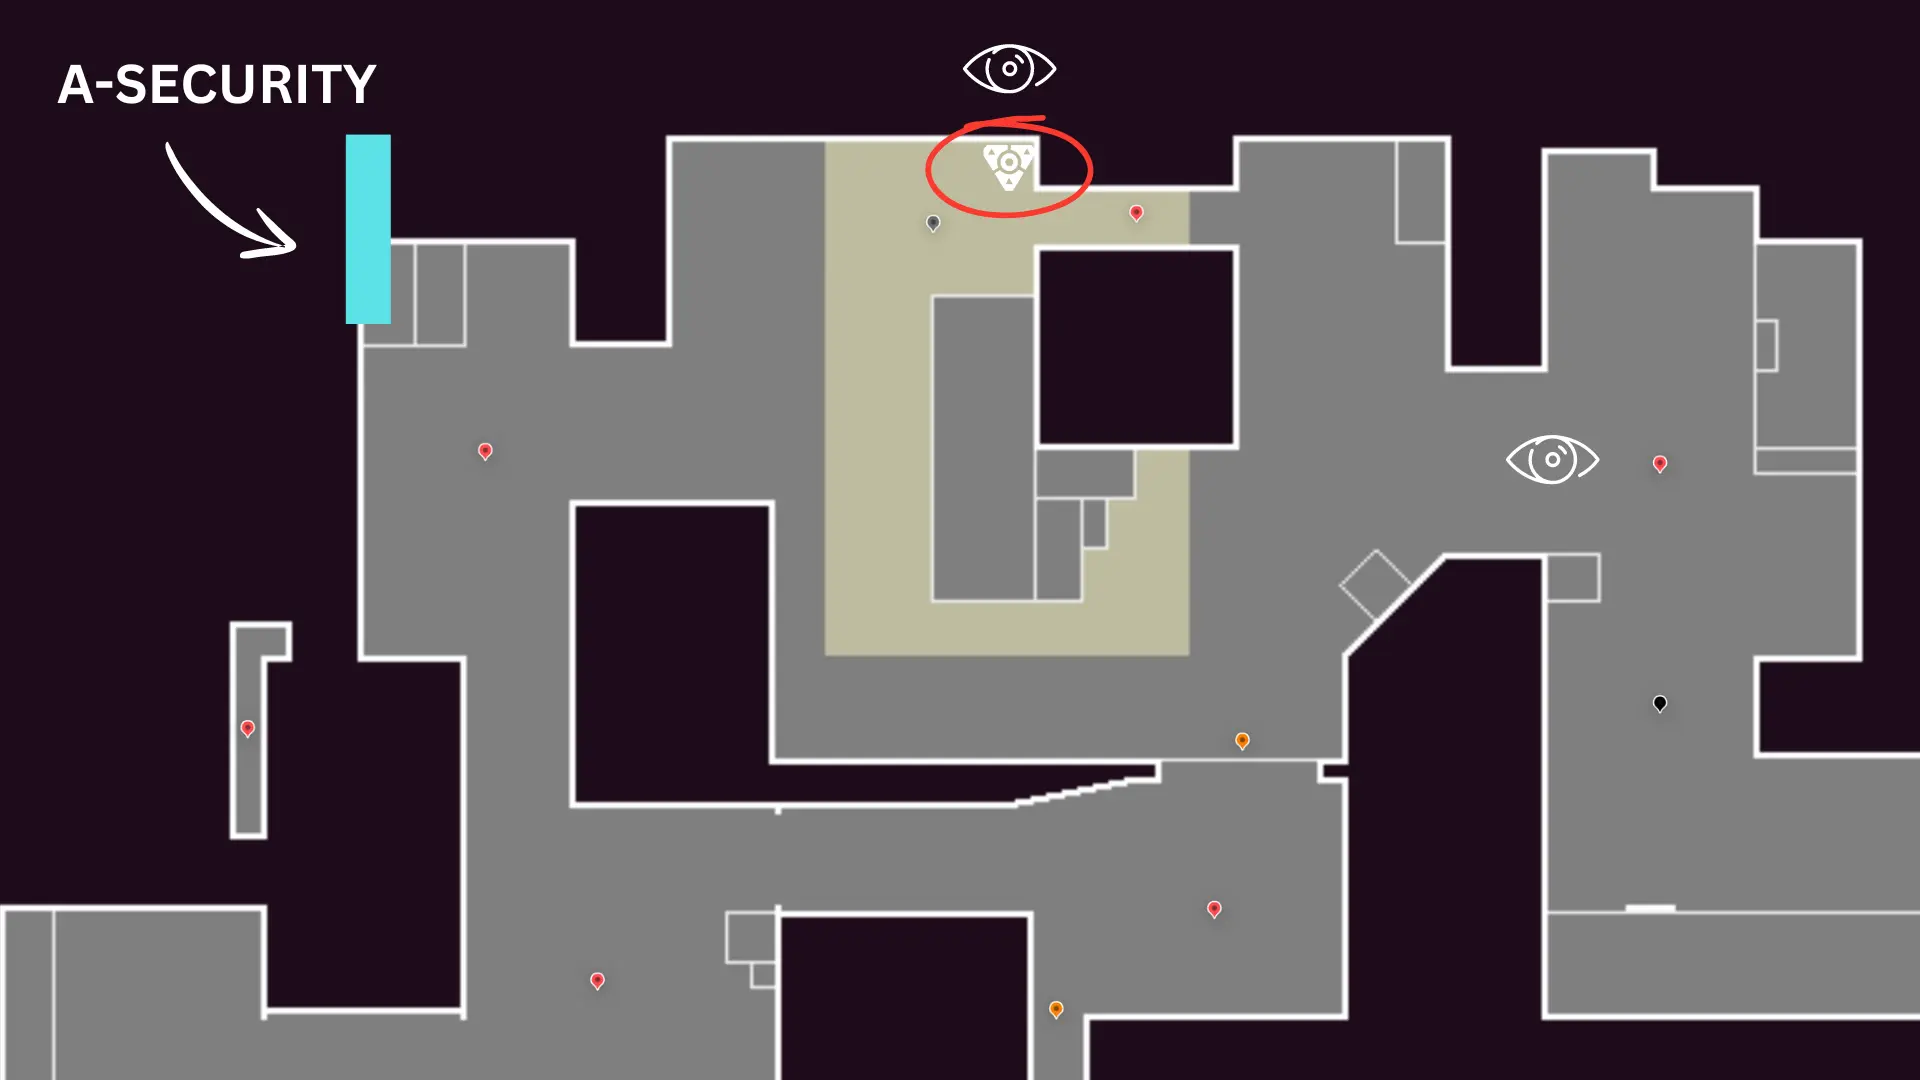 Image Credits: Riot Games
This wall is good for both A post plant, when you’re playing attack, but also if you want a safe peek into A-MAIN when playing defense.
To place it, you just place your wall on-top of the boxes in the back of A-SECURITY, so that the far end of the wall goes outside the map.
Now you can either position yourself on the right side of the wall, to peek A-MAIN, or balance yourself to the left end of the wall, to peek onto A-SITE near to the bridge. If the spike is planted as shown in the picture on the top, then you should be able to get some free picks if the enemy diffuses.
A-MAIN Early Peek
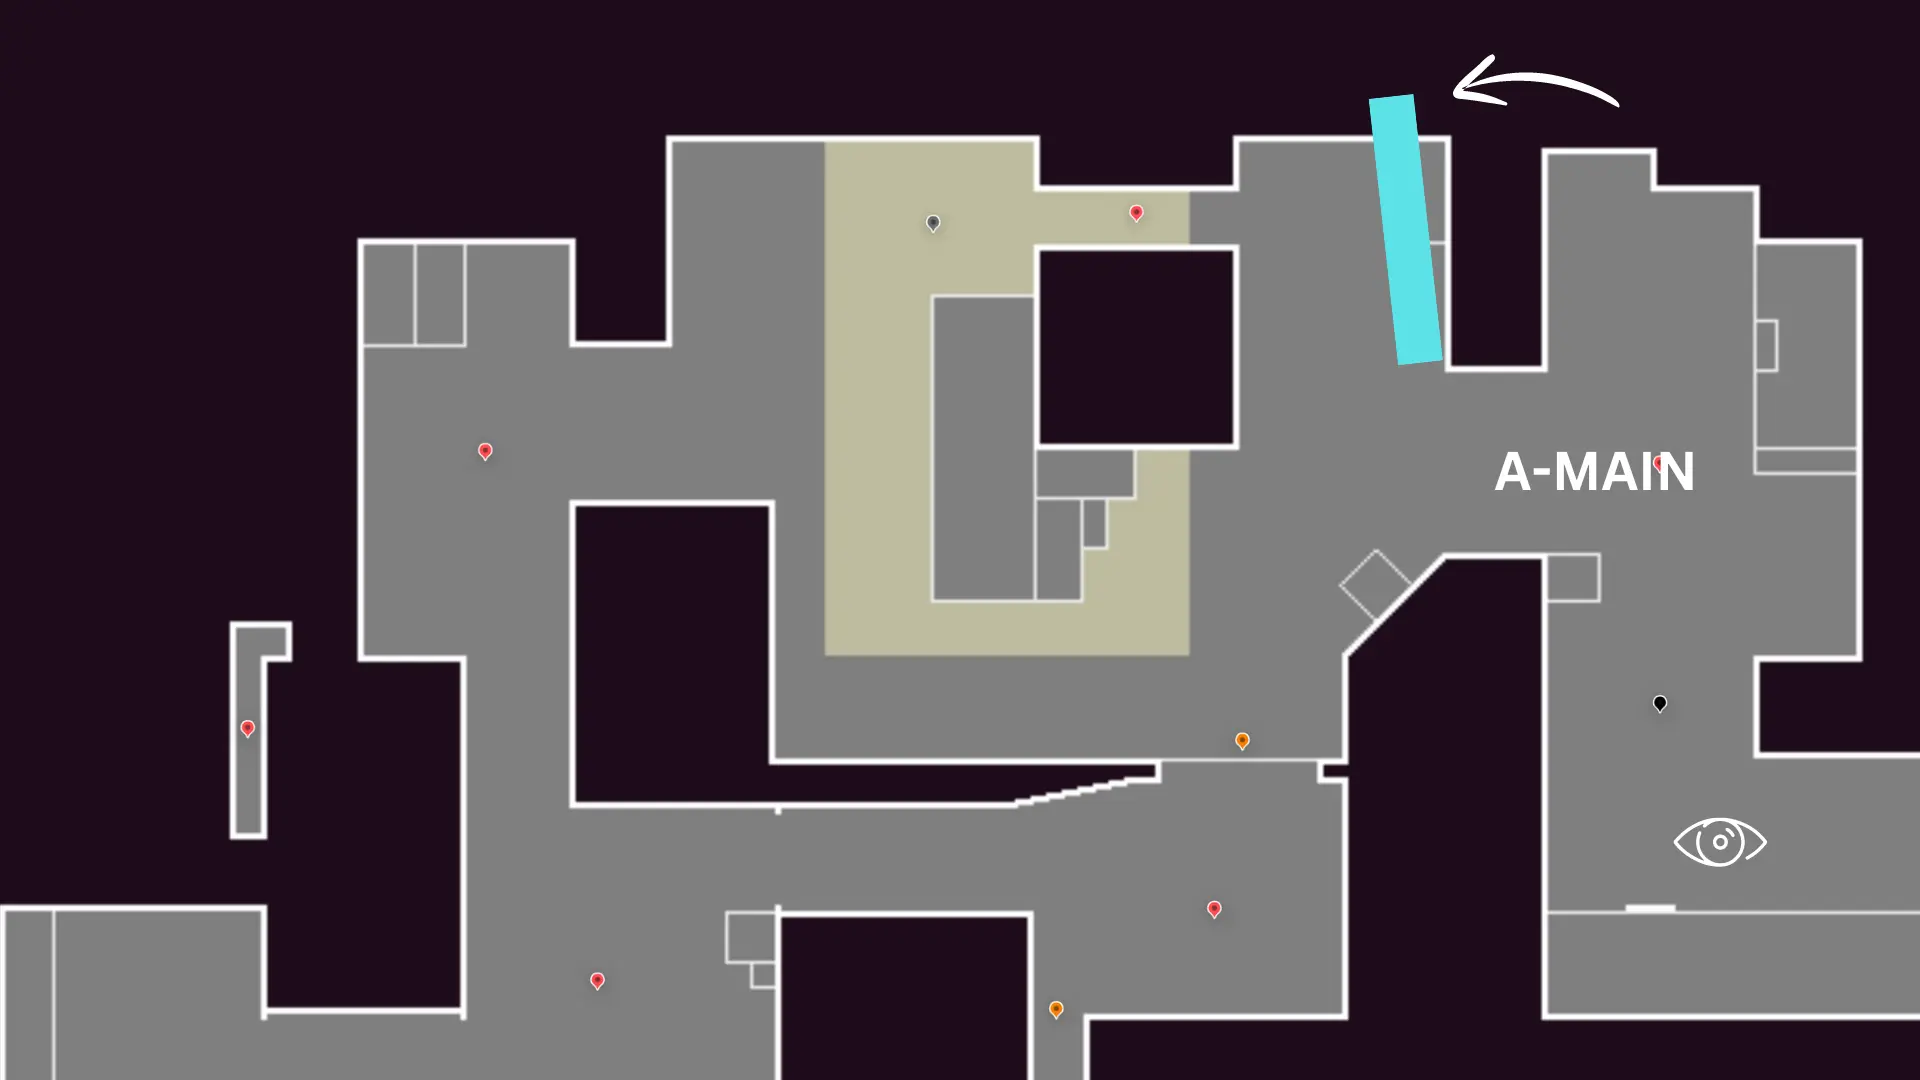 Image Credits: Riot Games
To give the enemies as little space as possible, place this wall onto the box in the front site of A-SITE, right next to A-ENTRANCE.
When on top of that wall, you get a great look into A-MAIN.
If you’re feeling adventurous, you could also try to use the left end of the wall, to jump into A-MAIN from the back (but I’d be careful there... you might jump into a full-stack of enemies).
A-SITE One-Way
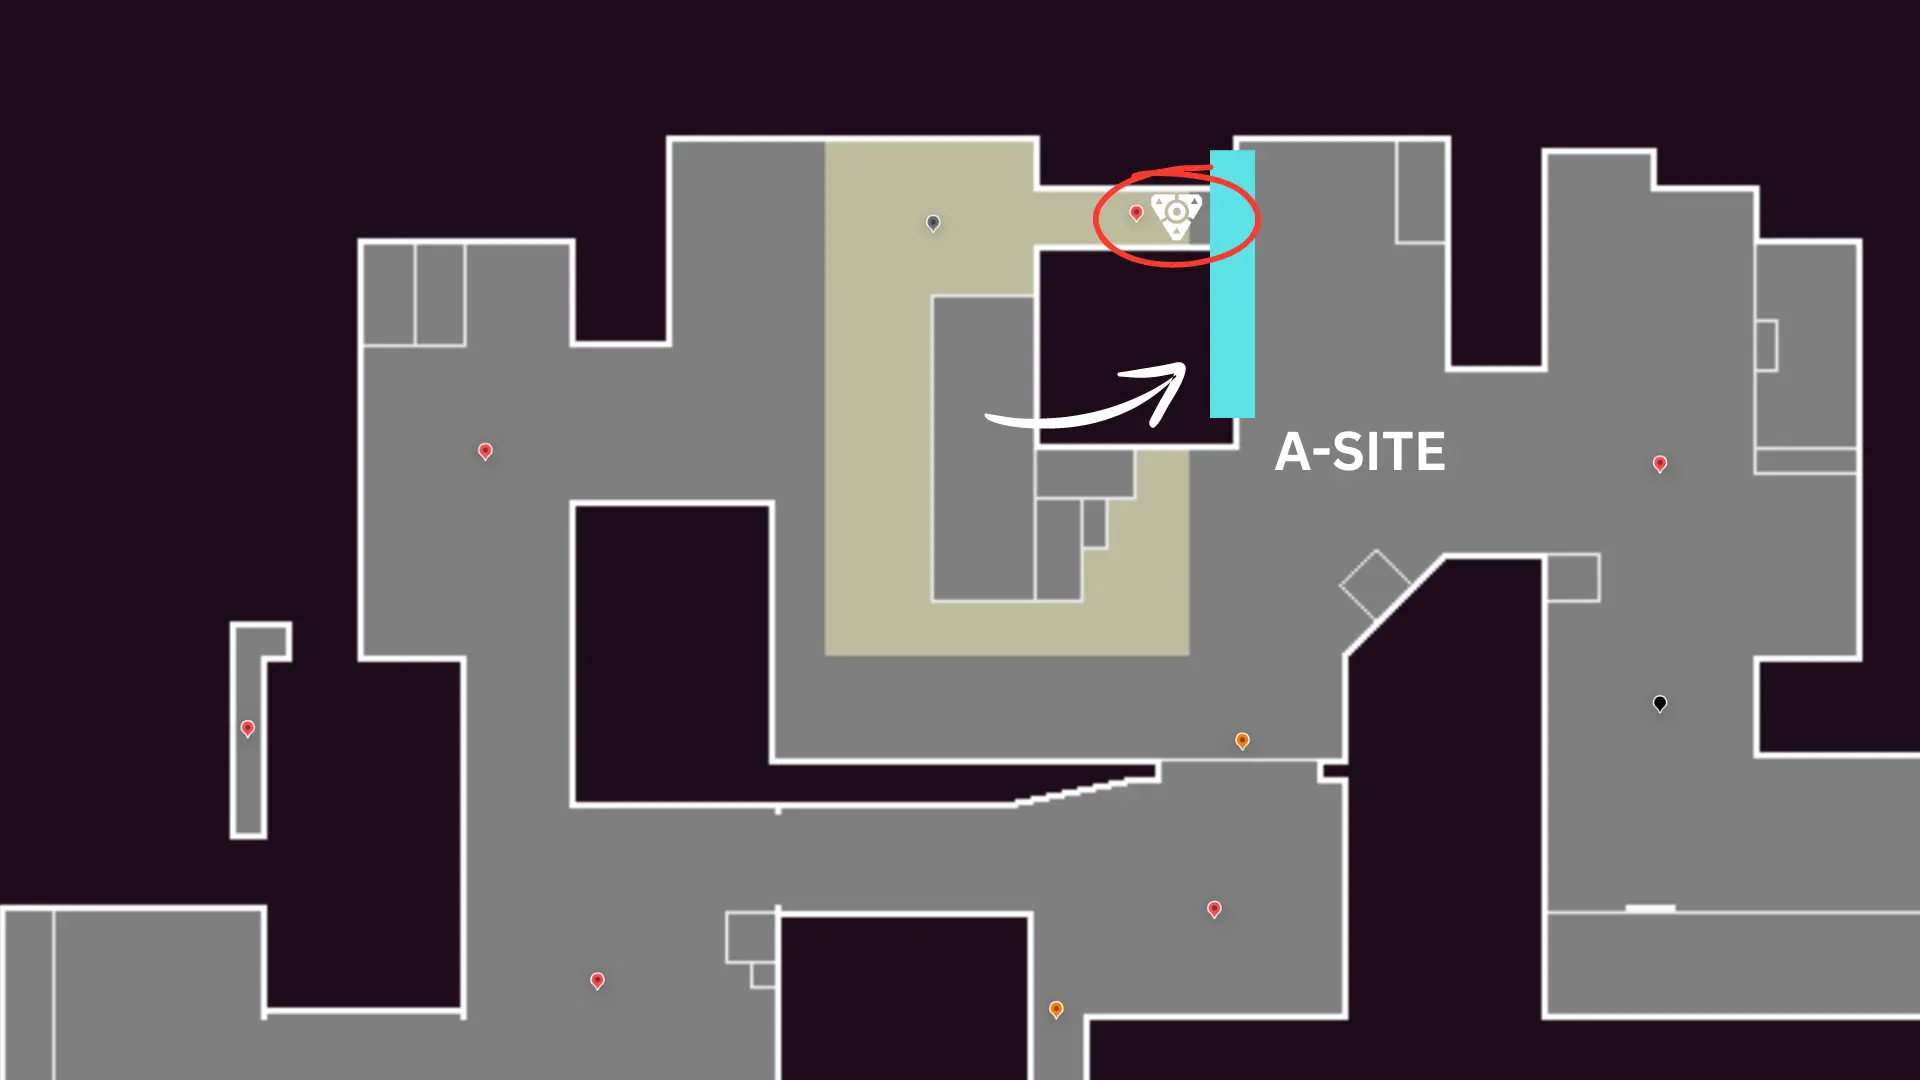 Image Credits: Riot Games
This wall is great for post-plants. If you successfully captured A-SITE, plant the spike on A-BRIDGE and place your wall on top of the edge, as shown in the picture above.
Now position yourself inside A-MAIN and peak the spike once the enemy team diffuses. This is a one-way, so the enemy should not be able to see you, while behind the (floating) wall.
MID Catwalk Peek
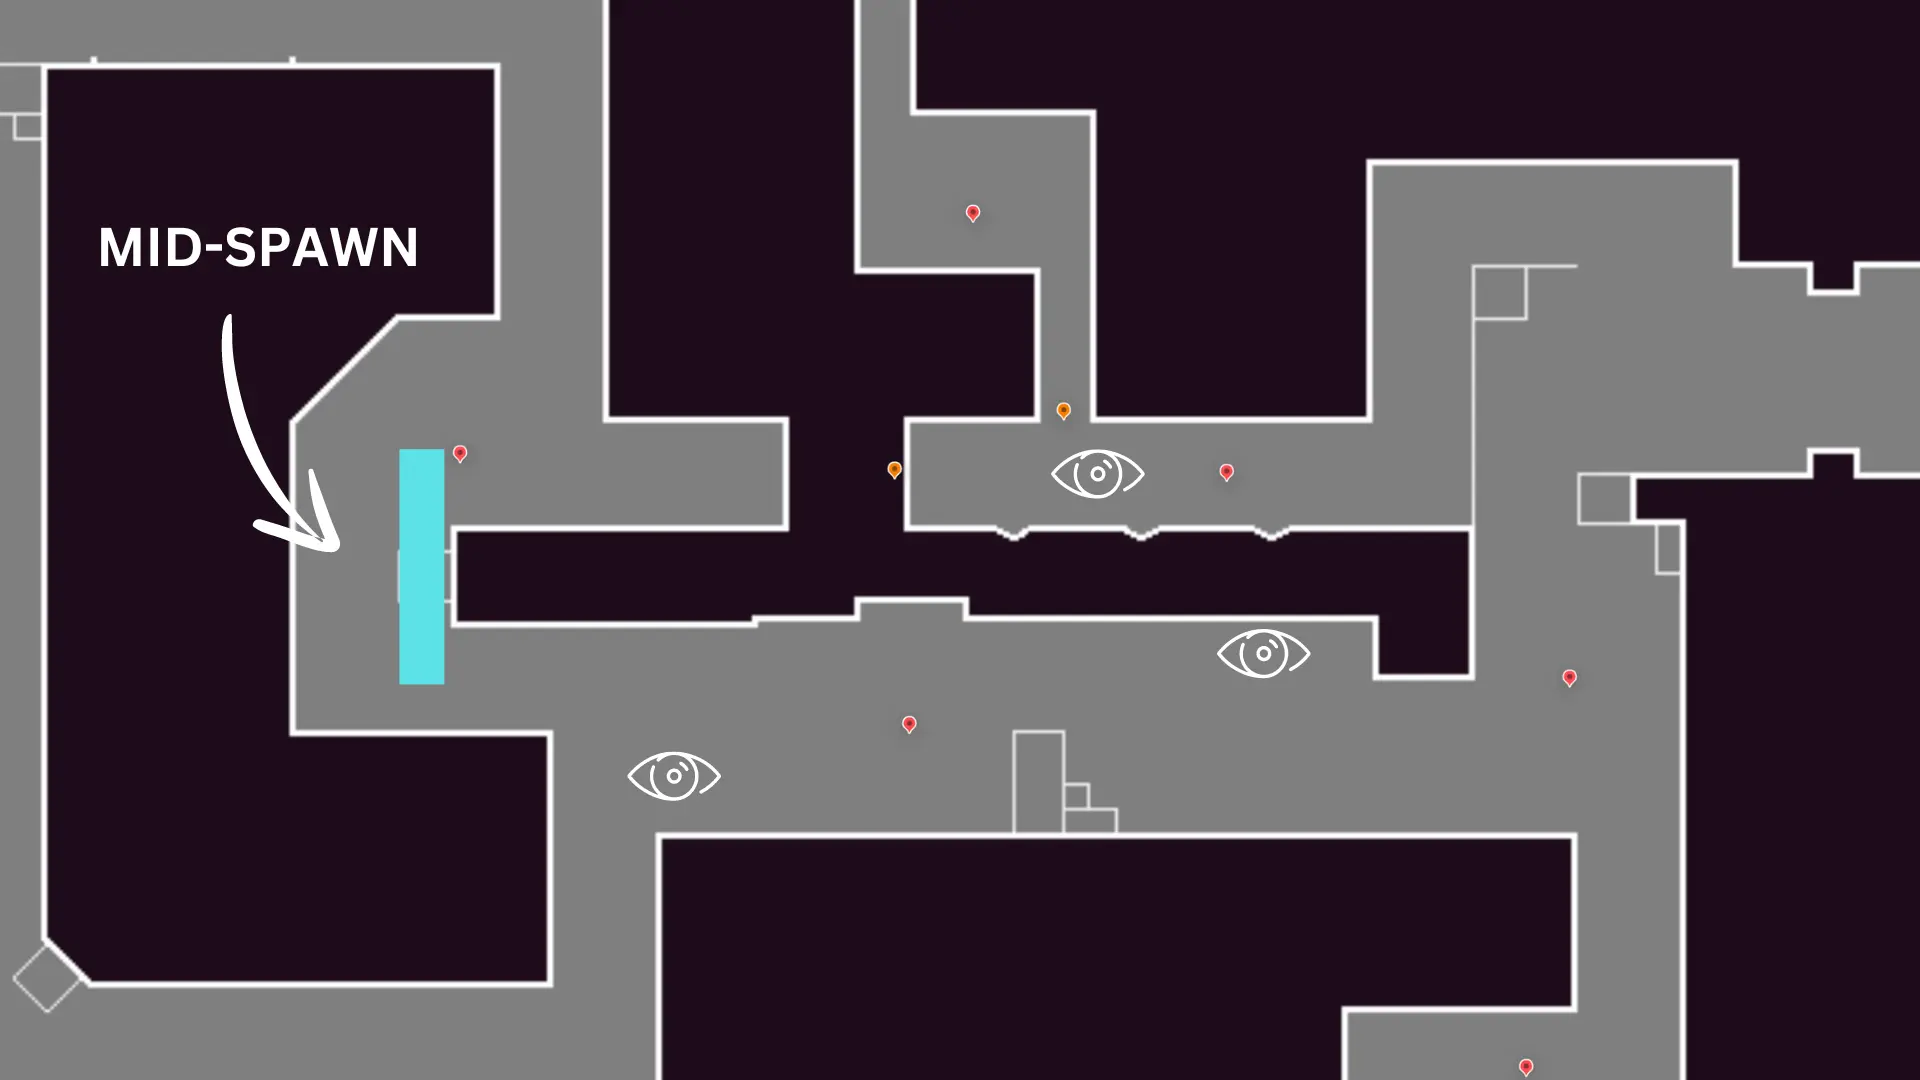 Image Credits: Riot Games
If you have a Raze in your team, ask if they can boost you on top of the box in MID defender spawn. If you place your wall there, you’ll get a full peek into CATWALK and the whole right site as well.
B-MAIN Early Peek
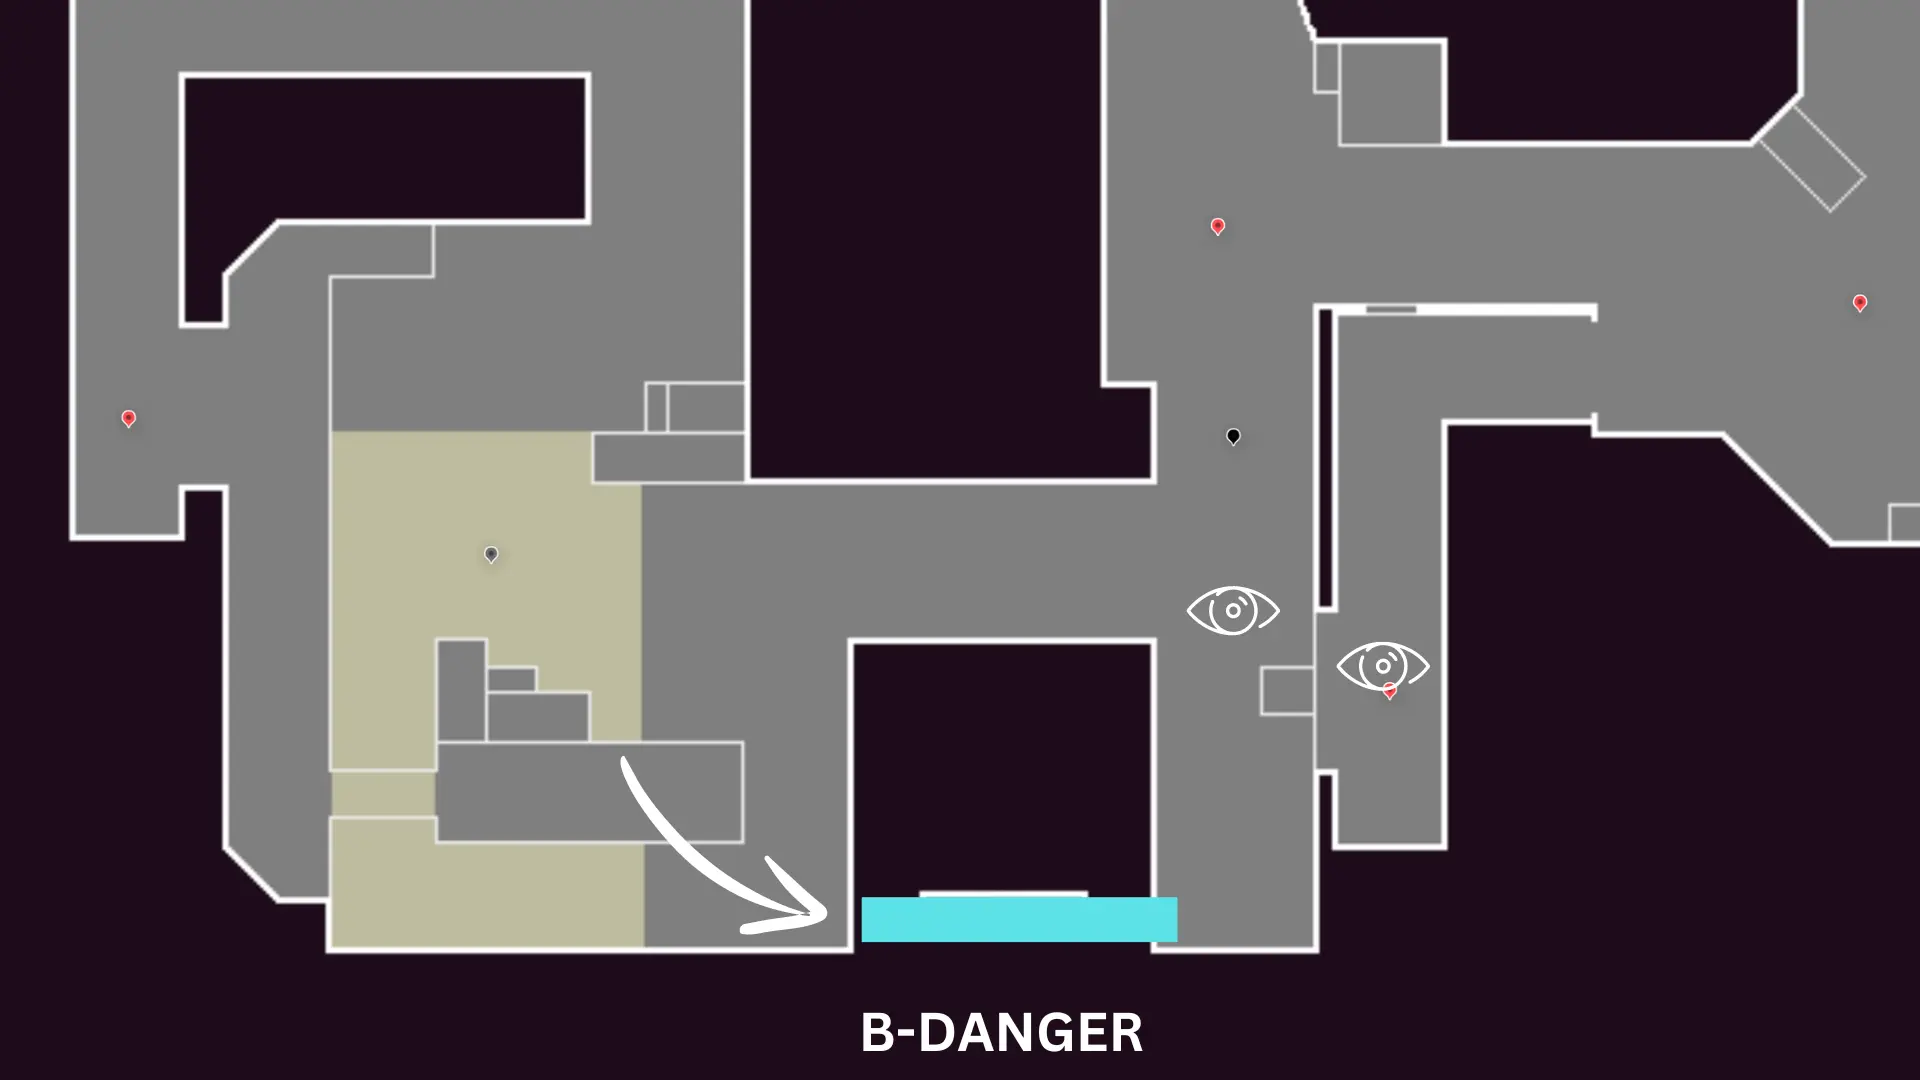 Image Credits: Riot Games
If you want to peek at B as early and as ratty as possible, we got something for you. This wall goes on top of B-DANGER. To place it accordingly, you must find the right spot with your crosshair, so the wall is placed lower than normal. You’ll be able to jump on top of the wall anytime and get a perfect peek into B-HEAVEN and B-MAIN that no one will expect.
B-MAIN One-Way
 Image Credits: Riot Games
This nasty one-way wall is perfect for defense on B-SITE. To place it, go into B-ENTRANCE and look at the edge of the map (in the direction of B-DANGER). Now jump up and place your wall.
If you did it right, then you should be able to see some feet, once the enemy team tries to enter.
B-SITE High Peak
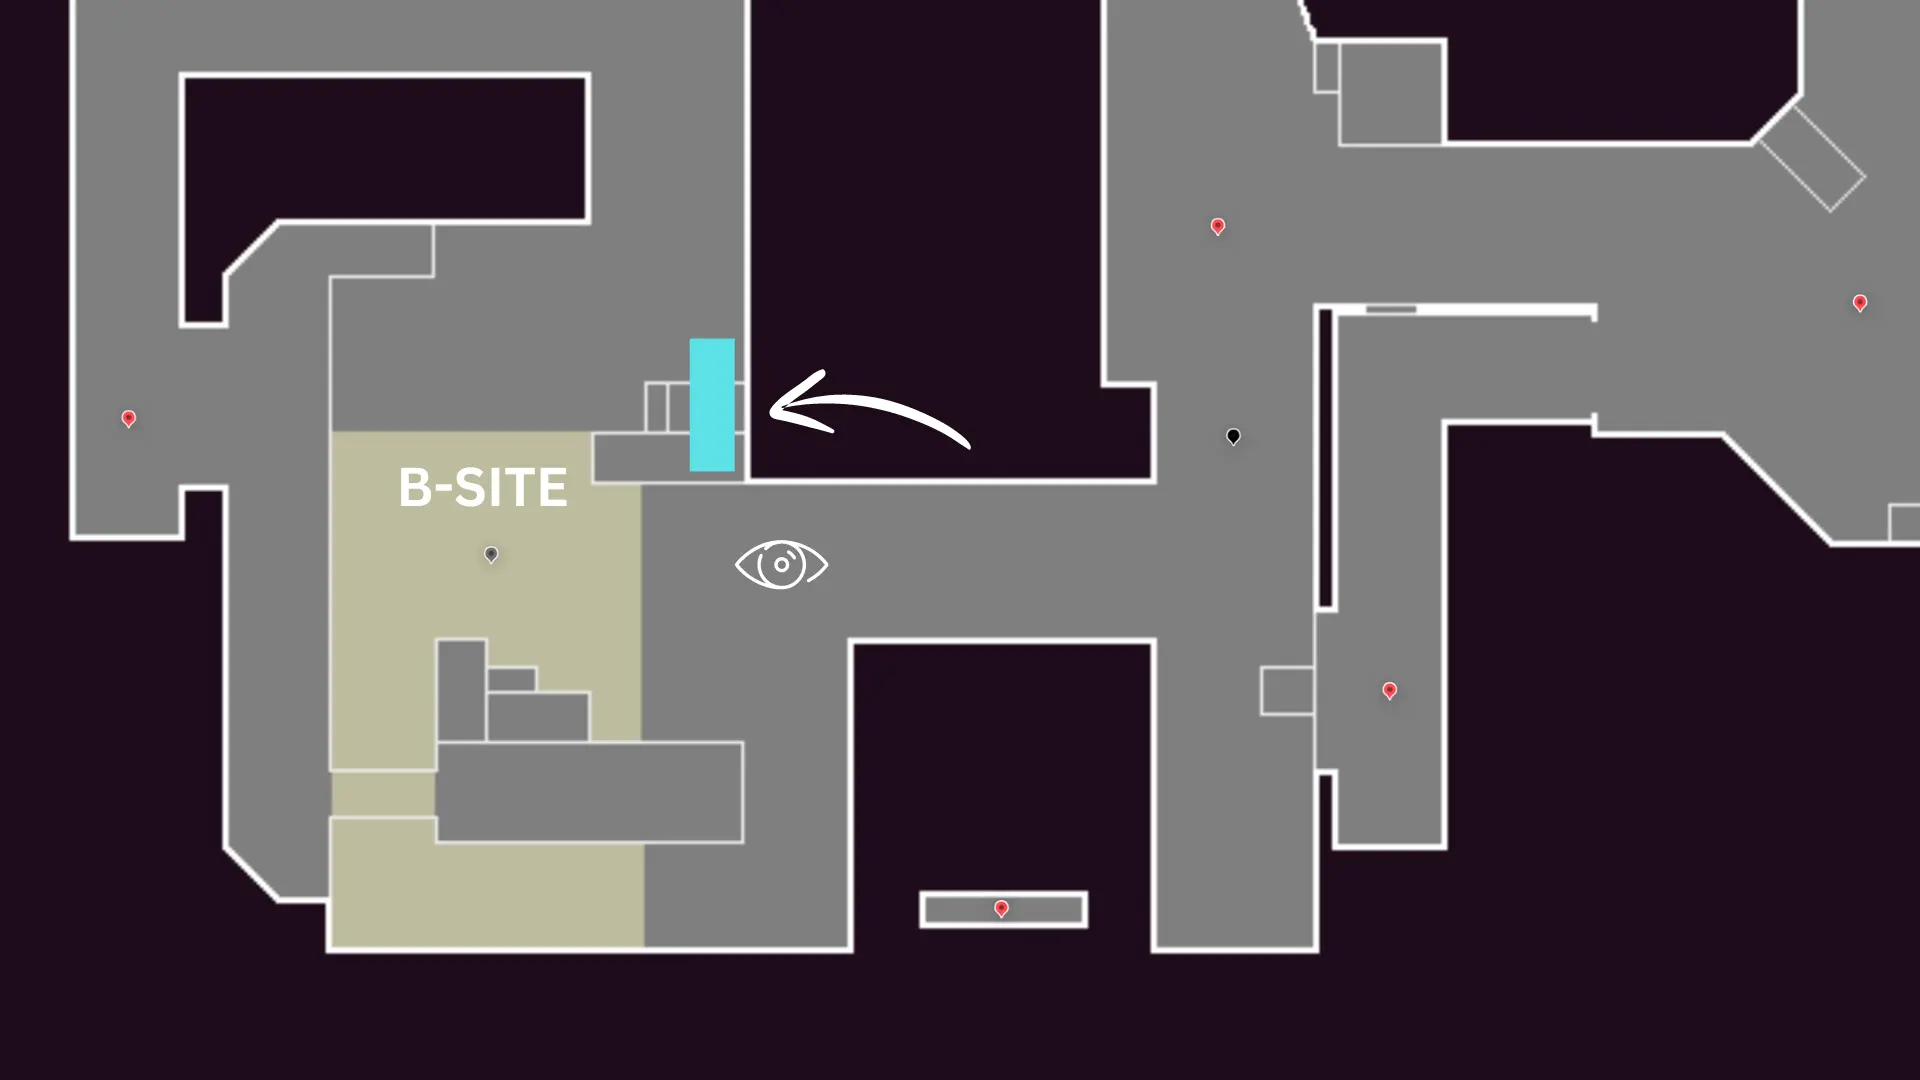 Image Credits: Riot Games
This wall creates a great off angle for defense. Jump on top of the first of the two boxes on B-SITE (as shown in the picture), jump up, and place your wall on top of the larger box.
Now just destroy any of the overlapping wall-tiles, so that the enemies don’t see your wall when entering site, and you’re good to go. Now you should be able to get a few surprise picks if enemies are trying to enter B-SITE.
These are our favorite Sage walls on Abyss. Do you know more? Let us know!
About the author
I'm a gambler who loves betting on just about everything, from soccer, esports, roulette, tennis and even slap contests. If you can bet on it, you can be sure that I've taken a chance on it.


